Another busy week with lots to show you, lots to explore, and lots to get done ! Let's get started !
PAPER & JEWELRY ...
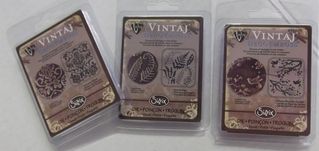
The first thing I want to share with you is Vintaj. This is a company that makes the most beautiful metal components for beading & scrap booking. The blanks can be embossed, stamped, punched, coloured ... almost anything. Several scrapping companies have joined with Vintaj to create some wonderful complimentary products ... Sizzix and Ranger. Sizzix has made a line of DecoEmboss folders that will emboss a design on the metal. Ranger has created Patinas, a line of inks that will add the most gorgeous colour to the metal pieces. So last weekend, I experimented ! And I fell in love with these products.
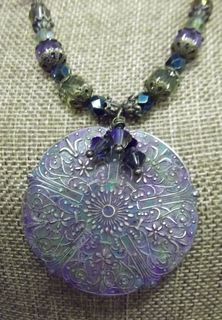
Here is a pendant I made ... this one comes pre-embossed and actually looks great as is ... but look what you can do with the Patinas !! For this piece I used the "Victorian Gable" set. They are just dabbed on with a brush and then wiped with a soft cloth. You use only a very small dot of each colour. Then when the colour is dry, you use a Vintaj Metal Reliefing block to gently remove the colour from the raised metal areas. Gorgeous ! This can be added to a scrap booking project or used in jewelry like I did here. FAB !
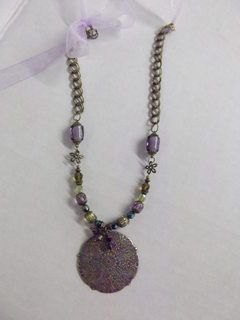
Here is another blank that I added Patina to, this time with the "Weathered Copper" set. It's hard to stop !! lol.

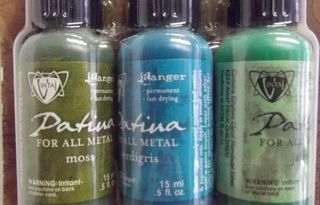
I have 4 different colour sets in stock "Weathered Copper", "Victorian Gable", "Rusted Hardware", and "Antique Window". There are a few more that I will have in soon as well.
You can also add colour with alcohol inks and embossing powder ... See ? Limitless !!
And then ... what if you could make your own embossed pattern on the metal ? Well you can !! With a Cuttlebug, Vagabond, or Big Shot, you too can create embossed blanks. The little folders from Sizzix are made up of various designs and you simply place your blank piece in the area you prefer.
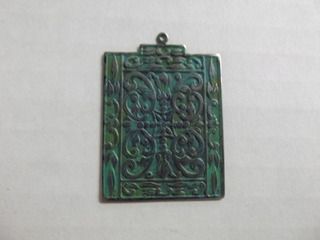
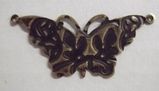
So this means you will get several different designs from each folder. Just place the blank in the folder where your favourite design is, place it in the embossing 'sandwich', and run it through your embossing machine. Voila ! Here is a butterfly blank that I embossed, then gently sanded with the Reliefing Block. Either side could be used. Limitless possibilities !!

I still have more experimenting to do ... I know, it's rough, but it's a sacrifice I will make ... lol...
One of the other things you can do with these blanks and the others I have from metal Complex is stamping - as in with metal punches. I have letter sets in stock that will enable you to create tags and pendants with words of your choice. I am also working on getting a few sets that can be rented ... so you can give it a try & see if you want to invest in a set of punches. There are several inexpensive starter sets though for those who wish to jump in !! MORE possibilities !!
Vintaj also has smaller findings, wire, beads, charms etc ... so there are plenty of items you can incorporate into your work as is. So much fun !!
 I would suggest you check out their blog ... lots of tutorials & projects and the Idea Gallery is amazing !! www.vintaj.com/wpblog/
********************************
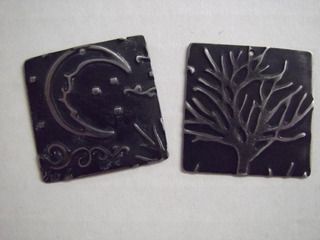
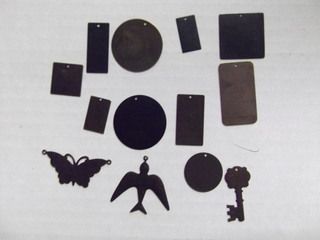
Another "cross-over" is the new tiles from Prima. These are made to be put in layouts, on cards, and on altered art ... but I love them for jewelry too ! Here are a few ideas ...
* add a small pinback for a tiny pin.
* add a glue on bail ... and you have a pendant or charm !!
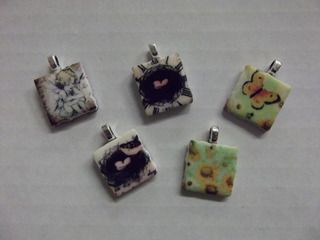
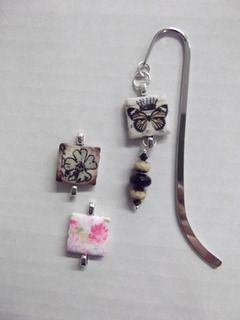
* add 2 glue on bails and you have a link ... perfect for a bracelet or a bookmark !
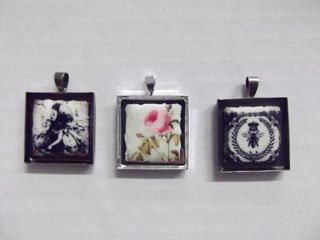
* glue it inside a pendant blank for an interesting pendant with a little more presence.
I have these tiles for sale in packages, individually, and some with bails already added. They come in about 6 different themes so there is lots to choose from !!
Also ... I am cleaning out boxes and bins ... so watch for various items REDUCED TO CLEAR !!!
**********************************
Now ... on to other things ... how about Washi Tape ? If you aren't familiar with it , it is a Japanese masking tape that has become very popular with scrapbookers & card makers. It is translucent and comes in all patterns & colours. BUT, you can make your own !! I did that on the weekend too and was thrilled with the results !
So here's a step-by-step.
You will need ScorPal tape (or a similar 2 sided tape) and stamping tissue.
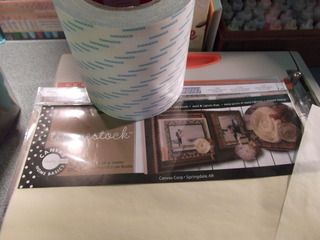
I have the tissue here in cream & kraft and will be selling it by the sheet and/or package. I used the really wide tape but you can use any width or the sheets. I will have some sheets of tissue already backed with the tape for sale here if you want to give it a try but don't have the materials. So ... now ... I cut my tissue/tape combination in 4 pieces. You can cut it whatever size you wish. I knew I would really only use shorter pieces, so that was fine. But you could make lengths the full 12" . Then choose stamps and inks. I used Archival ink but I think you could use any inks. Small stamps work well - just stamp randomly all over the tissue, varying the direction and the colour if you want. Allover large stamps also work well because they are going to be cut in strips and that seems to make the pattern more unique. Here are a few examples of my tape pieces.
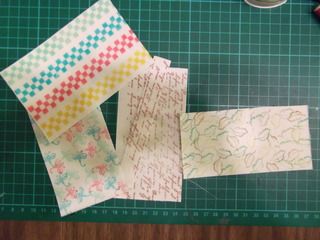
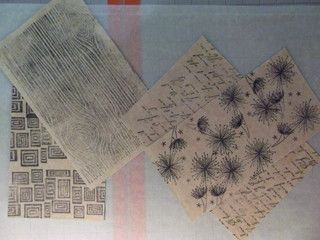
I used various colours on the cream and then just black on the kraft. They have to dry for a while .. the ink seems to stay wet longer on the tissue and could smear if you aren't careful. I dried some with a heat tool but really just leaving them seems best. When the ink is dry, simply slice into strips, peel off the backing, and HOMEMADE WASHI TAPE !!!
* The only real difference is that original washi tape can be removed and your homemade tape is permanent ... but less expensive !!
***********************************
Lots of graduation papers, stickers, diecuts, rub ons , etc ...
KIT OF THE WEEK :
PAPER: * I will add this info on Wednesday ...
JEWELRY :
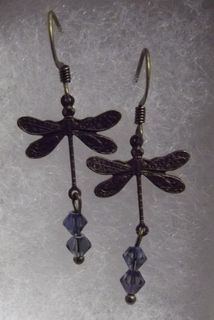
Here are some lovely dainty earrings using a Vintaj dragonfly finding and a few crystals. They look so vintage !! I think they are beautiful ! The materials + photo are available as a kit for $5.25.
So ... that's it for now ... I hope to add a little bit Wednesday after I have had a chance to work on a card kit ... keep watching !!
No comments:
Post a Comment